I’m going to show you just how easy it is to set up a Kindle device, even if you’ve never used a Kindle before!
In this essential step-by-step guide you will learn:
By the way, If you haven’t yet purchased a Kindle, you can save a lot of setup time by selecting the “Link device to your Amazon account”.
This is just below the “add to Basket” button.
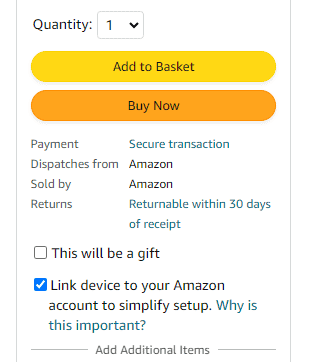
Saving you a lot of setup time.
In fact, If you have done this already you can skip most of this article and jump to Personalizing Kindle.
Not much nowadays!
A Kindle and a USB cable, also a small set of instructions on how to set up, but hopefully we’ll have this covered for you.
While a lot of user manuals suggest that you should fully charge the battery before use, this is a myth and battery technology has evolved and no longer suffers from memory effects.
Of course, there’s no harm in charging you device while you set it up, which is generally what I do.
First, we want to power up our device. The power button is located at the bottom of the device, just next to the USB C socket.
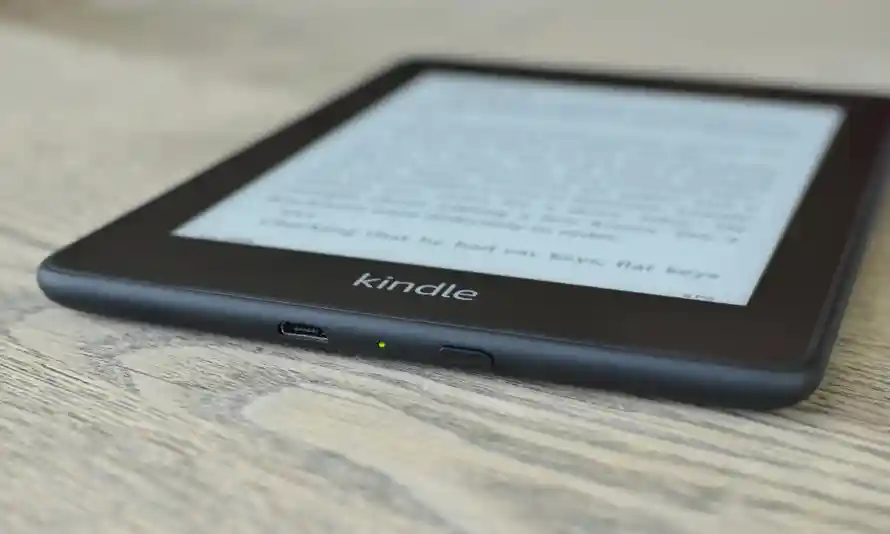
Press and hold the power button for a couple of seconds to start the device.
During power-up, you should see the Kindle logo.
Choose your preferred language and select Next.
Select your region followed by Next.
You should now see the Kindle logo again along with a progress bar. Kindle is now starting.
You are now given two options:
Set up on this Device or…
Set up with your Phone.
If you already have the Kindle App on your phone, this is a much simpler process and only requires bluetooth connection.
However, we’ll go through the first option; “setup on this Kindle” as most users will not have the Kindle App on their phone.
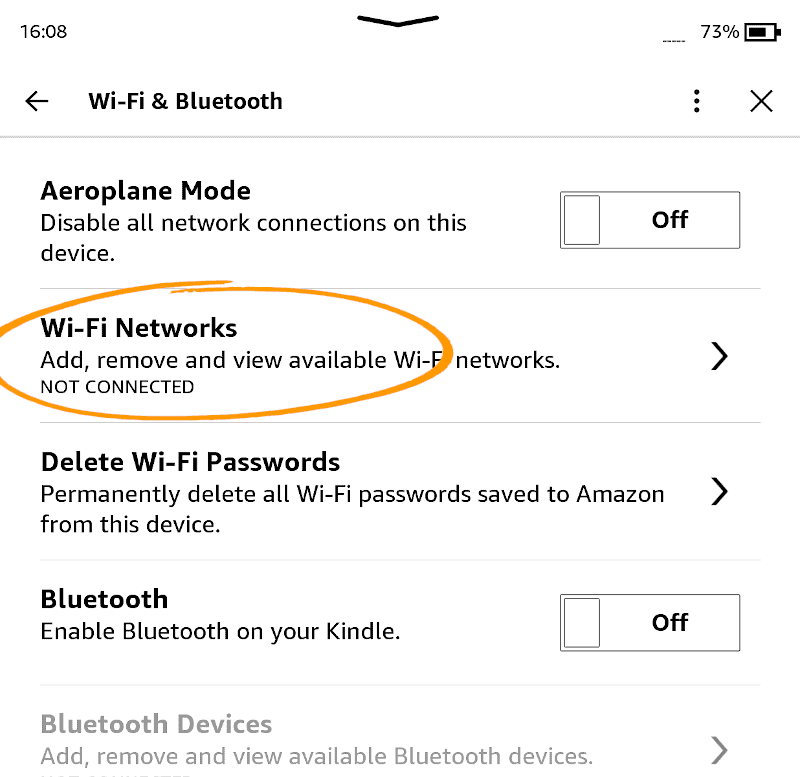
I’ll assume you already have an Amazon account, given that you are currently setting up a Kindle. However, if you don’t happen to have an account you can set one up simply via the amazon website. The only thing you will need is a personal email address to validate the account.
Next, we need to sign into your Amazon account.
Enter the email address linked to your Amazon account, followed by the password.
Once done, select Next to continue.
Kindle should now be connected to your Amazon account. Tap Next to continue.
Finally, before you access your library you are given the option to make this device child friendly.
If you enable this, you will not have access to any adult content (you know that means!). Personally, I find it easier for kids to have their own Kindle, as it avoids any nasty surprises, or many questions being asked!
At this point before you access your Library content. Amazon generally give you the option of 3 months free access to Kindle Unlimited.
This is a nice way to try Kindle Unlimited to see if it’s worthwhile for you.
You can check you first chargeable date by going to Your Memberships and Subscriptions.
Where Kindle really comes into its own is that you can customize your reading experience. From changing the font type, weight and size, all the way to margin and spacing, which can be particularly important for someone with reading difficulties.
First, we’ll change the font type.
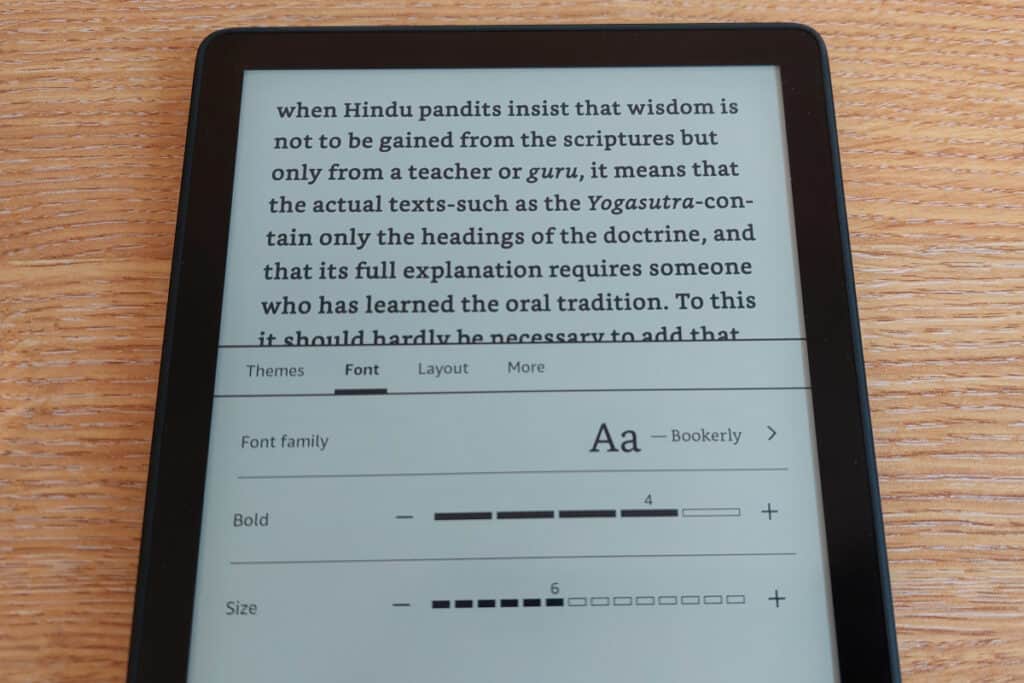
To personalize your reading even further, you can also import a custom font, just be sure to use OTF and TTF format fonts.
Going back to the Font Family, we next adjust the bold (thickness) of the text.
You should see a slider with a + and – signs on either side. Increase or decrease the text boldness to a thickness that suits you.
Just below that we have Size, which as you would imagine, increases/decreases the size of the text. Simply use the slider or +/- buttons on either side to adjust the text to a size that’s comfortable to you.
In the Layout tab you can customize even further with a number of features including:
Orientation – Rotate your text from portrait to landscape. This is especially useful for pdf documents with drawings and diagrams in the landscape position.
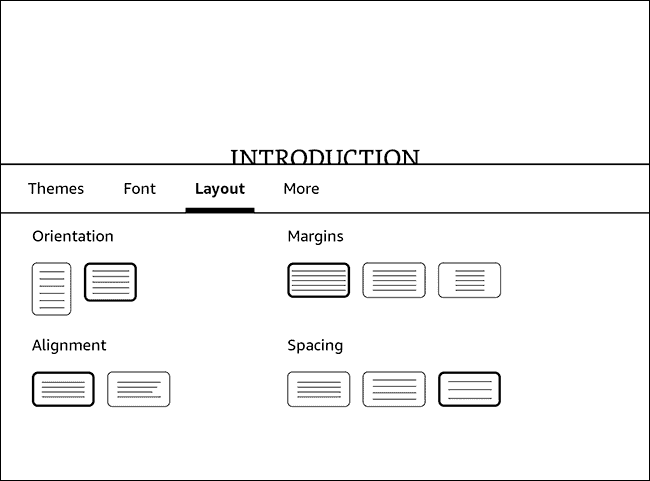
Finally, the Themes tab allows to you save your customized settings allowing you to switch from the standard settings available (standard, compact and large) and back to your own. This is useful when you wish to read a report or professional document which may require clearer text.
One of the advantages of using a digital reader is the ability to read in the dark.
To adjust the brightness and color warmth (or hue) of the device, use the following:
Tap near the top of the screen to bring the top menu.
Now, tap on the downward arrow at the top center of the screen. This will bring down a number of options.
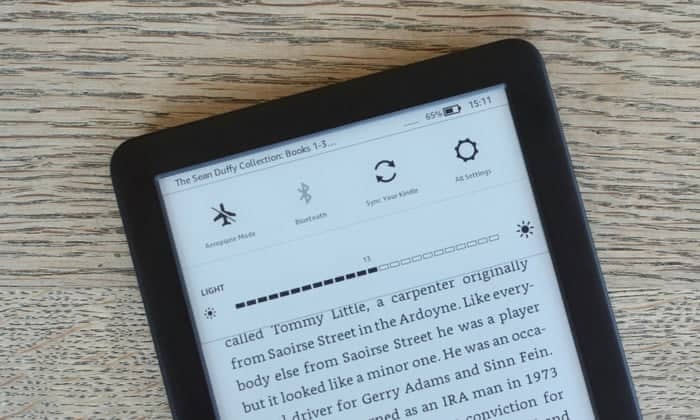
To come out of this, simply tap the arrow again which is now pointing upwards.
As well as the customization features, we’ve previously discussed, Kindle has a couple more enhanced features.
This is especially useful when reading in the dark as it reduces the amount of white light your eyes take in, making it gentler on the eye and helps reduce eye strain under low light conditions.
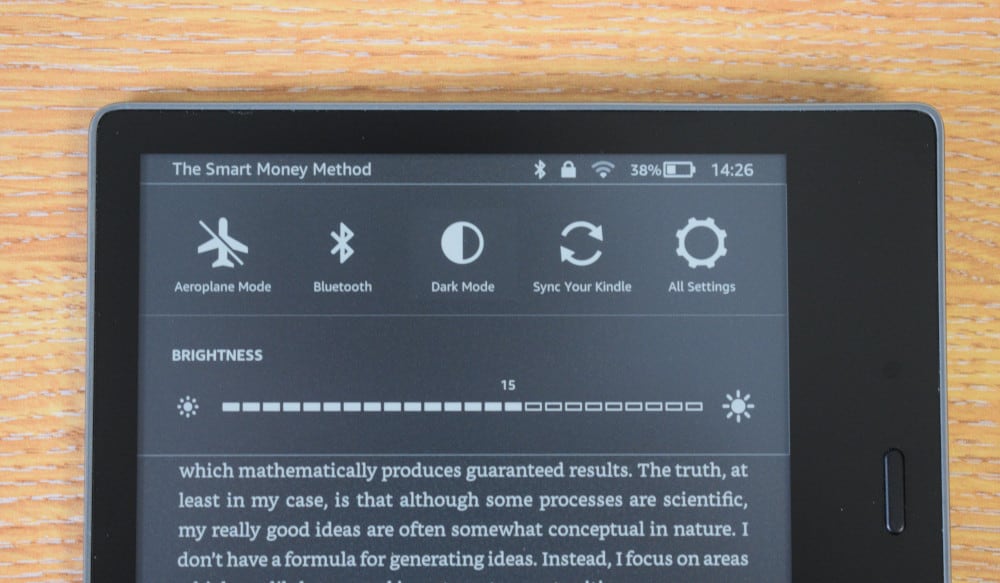
To enable this feature, head over to the drop-down menu and select Settings > Accessibility.
Tap on the Invert Black and White button and you should instantly see that the screen black/white has inverted.
While searching through the list of font types available, you may have noticed one called Open Dyslexia. As the name suggests the font is designed to help reduce the issues of reading for those with dyslexia.
It’s very rare to come across any issues when setting up a Kindle. However, some of the most common issues include:
If you are experiencing any of these problems, check out each of the guides or our Kindle troubleshooting guide which goes into detail and includes images to help you.
Congratulations.
If you’ve got this far you’ve successfully set up your Kindle device and are ready to read.
But before you go, you might want to check out some of these tutorials that will give you a understanding of the Kindle user interface and how to organize your library like a librarian:
